Showing posts with label nail art. Show all posts

Monday, January 21, 2013

french mani monday

Hello! Ah Monday is almost over... today was actually not so bad of a day. Work flew by and I seemed to have a productive day. I have no complaints overall. For some reason, I struggle to produce blog posts when I'm home... not sure why, but I need to overcome that! I've been doing my nails regularly, I just have no motivation to blog.

Yesterday I needed a palate cleanser, so I went with a French manicure. I loooove French manicures- I really should do them more often. It just annoyed me how fast they chipped. I was doing a lot of work with my hands today, so it's my own doing, but still very annoying. Here they are:
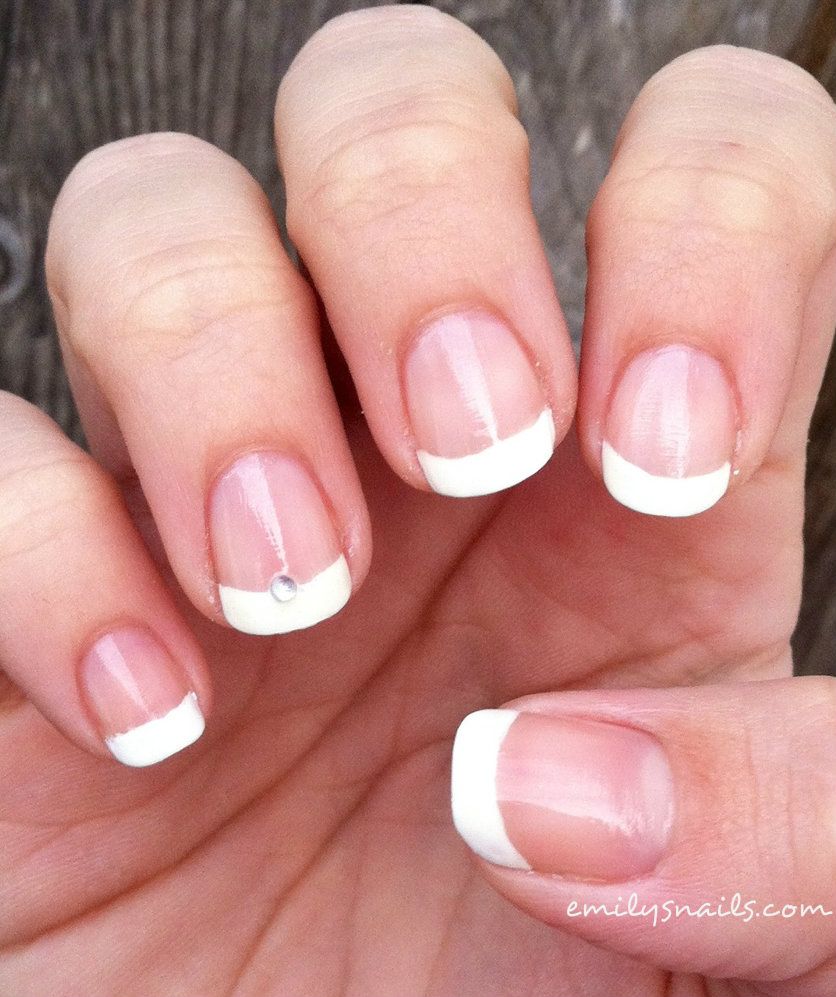
 

I freehanded the French tips, which I'm pretty darn proud of. I have no artistic ability whatsoever but these could probably fool you into thinking I do. ;D This is OPI Alpine Snow on the tips and a coat of the soft Essie Cloud Nine. I then topped it with a new top coat of mine, Cult Nails Wicked Fast. It really did dry really fast, and I noticed that it seems to be much thinner than my faithful Seche. 

What do you think?

Sunday, January 13, 2013

blue abstract gradient

Hi ladies, happy SUNDAY! I am beginning a little mini vacation from the horrible stresses of work. I'm super excited. I took four days off to go up to the bf's lake house to simply relax, unwind, and spend some time together. It couldn't possibly be any more needed than it is right now.

I start my student teaching in 15 days, and I need some relaxation before that. I'm excited to start but at the same time I'm also a bit nervous. It'll certainly be exciting to break into my field of study more. I love kids, and I'm so passionate about education. 

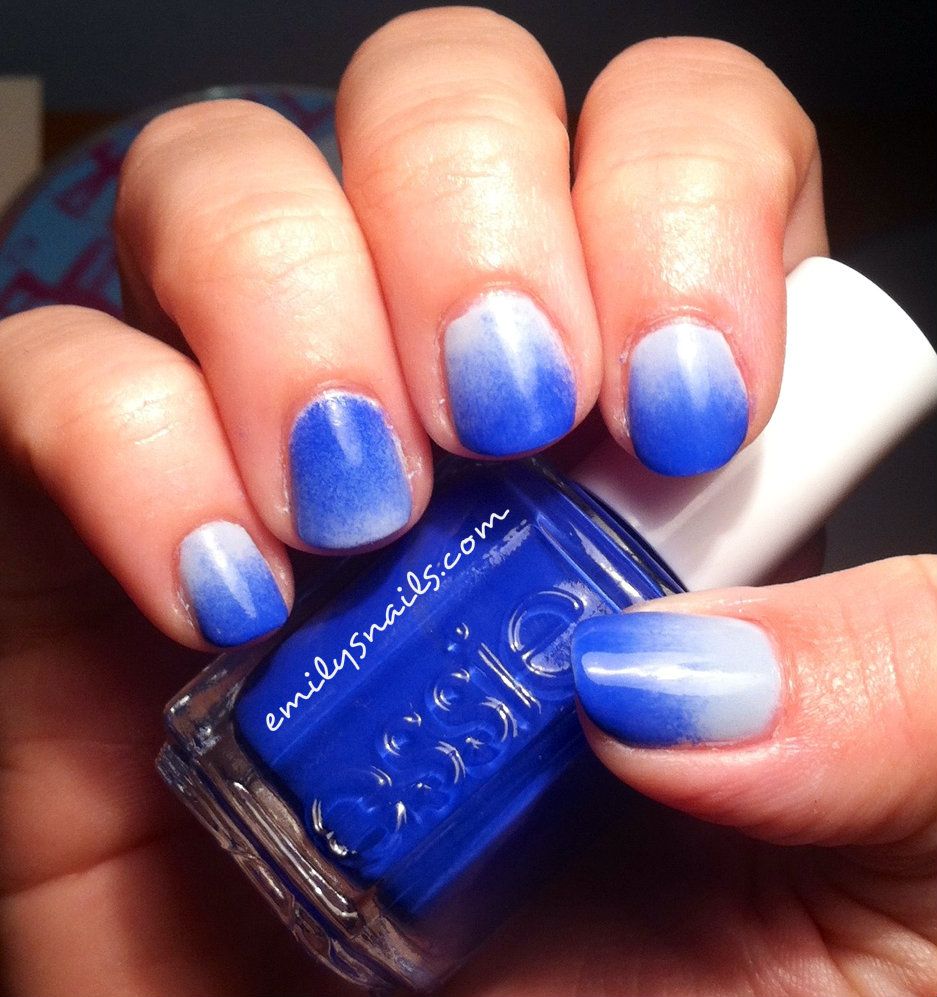
Anyway, as I try to add some nail art to my schedule, I decided to do a blue gradient. I recently got new glasses that have a blue ombre side- I guess you could say I was inspired by that. 


I used two coats of Essie Lilacism for my base then sponged on more Lilacism and Essie Butler Please. These colors are so fun together! I was worried that Lilacism would be too purple-toned but this worked out nicely. The formula on Butler Please is amazing, and the formula for Lilacism is typical of a really light polish. I did my best to not have any evident bare spots, and the sponging on of the gradient definitely helps with this. I sponged on two times, not just once.

This type of manicure is one that people really do notice. I had a bunch of people who don't usually notice my nails stop and point them out.

What do you think?
Wednesday, November 7, 2012

snow, snow, snow...

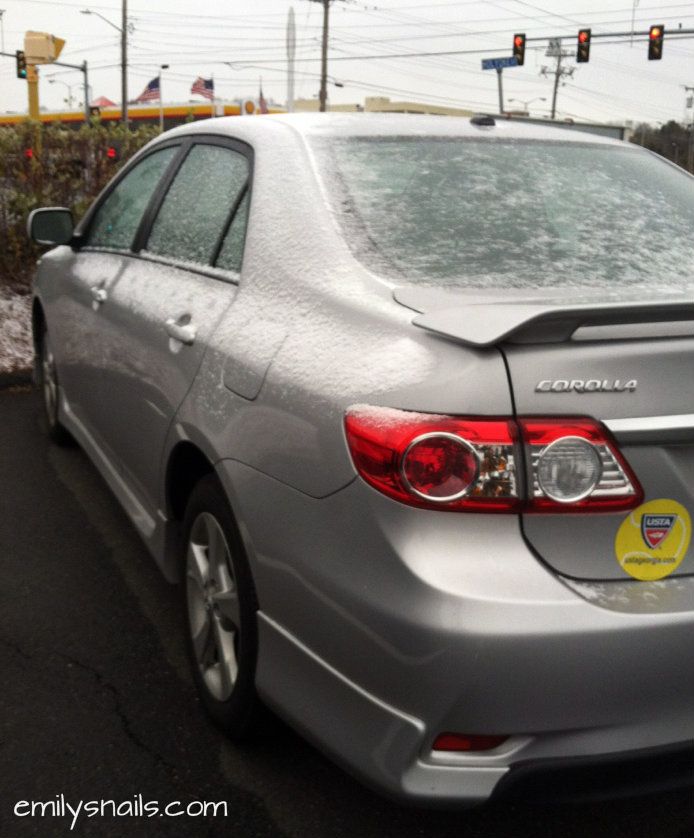
We're experiencing the first snow fall of the year here in Massachusetts.. and I am not all that thrilled about it! I hate the cold weather, and seeing snow makes it completely evident that the warm weather is over for a while. It's just so cold and bitter out, makes me want to do nothing but stay in bed and sleep. Here was my view when I got out of work today...


Okay, not that bad... but still. Yuck.

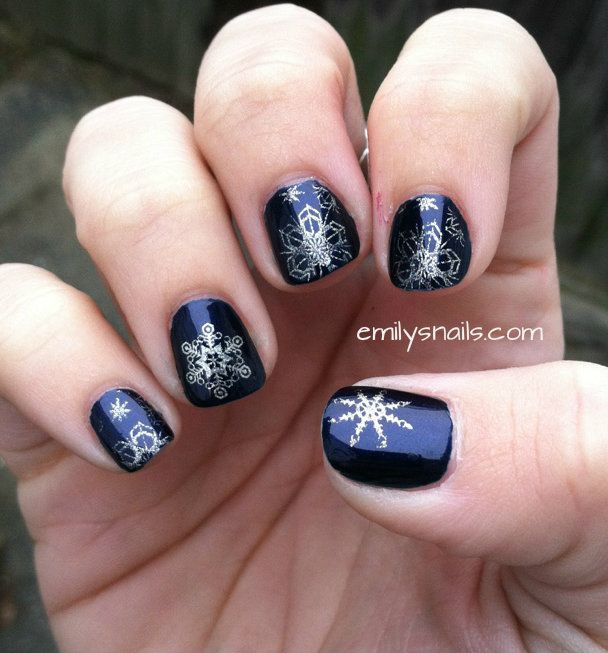
Argh. Last night in anticipation for this snow, I decided to do a weather-appropriate manicure. I pulled out my snowflake stamping plates and got to work: 


I used two coats of OPI Russian Navy for my base, a classic in my book. This was one of my first polishes, and I still love it so much. Application is very easy because the formula is great. The color is so opaque and rich that it's almost dreamy.

 To stamp, I used Color Club What A Drag. On my ring finger, I stamped with bm 319. My thumb is bm 14, and the rest of my nails are bm 323. What A Drag is a great stamping polish. I really like how it looks over RN. I also like the look of different snowflake stamps in one mani, it mimics how all snowflakes are different in real life. :)

What do you think? 
Tuesday, November 6, 2012

peacock print

Hi all! Happy Tuesday! I'm actually writing this Monday night and scheduling it for Tuesday so I can get this out of the way and study for a Spanish exam that I have tomorrow (well, technically today at this point). There are a bunch of different verb tenses on this test and I want to make sure I'm ready for it!

I'm pretty excited about the manicure I'm showing you today! It's something that's not necessarily complicated, but it looks great and really professional, at least if I say so myself. 

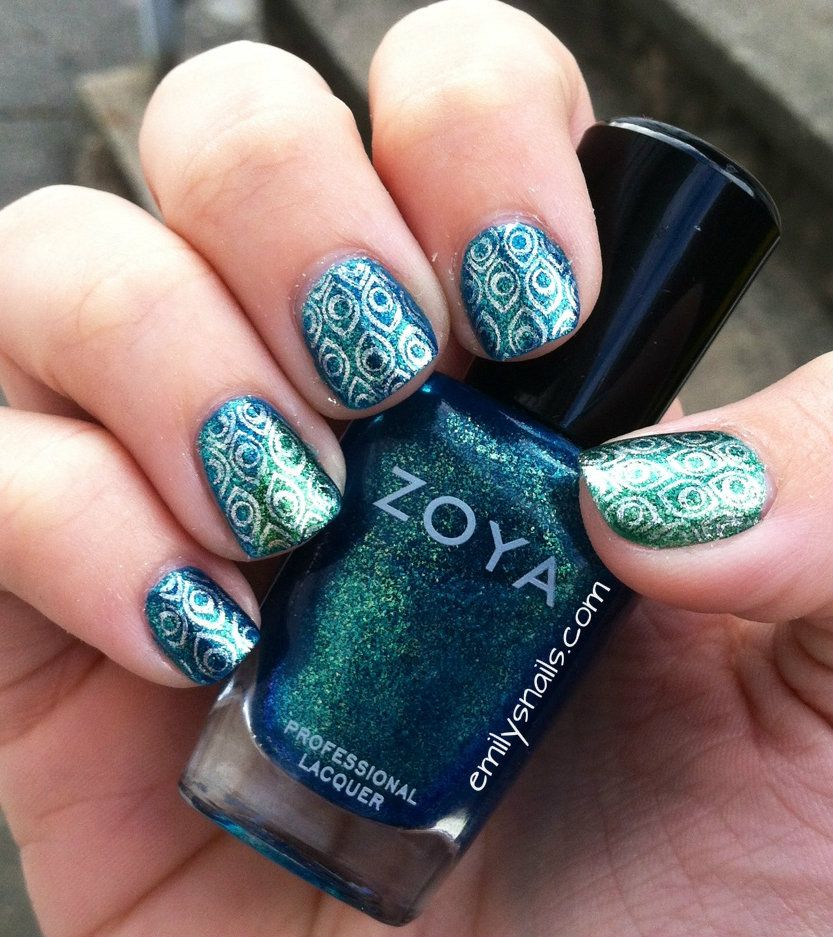
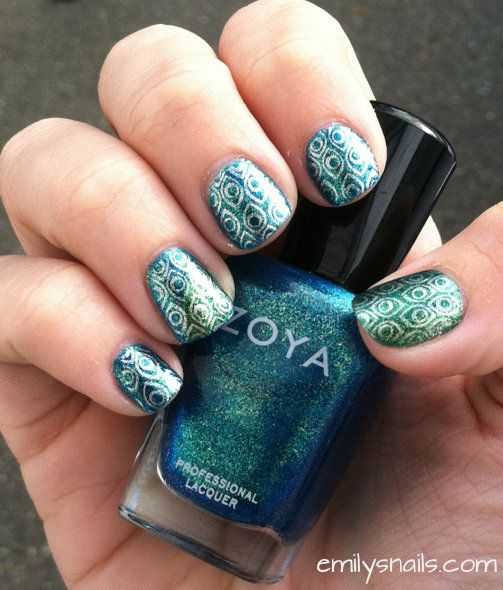
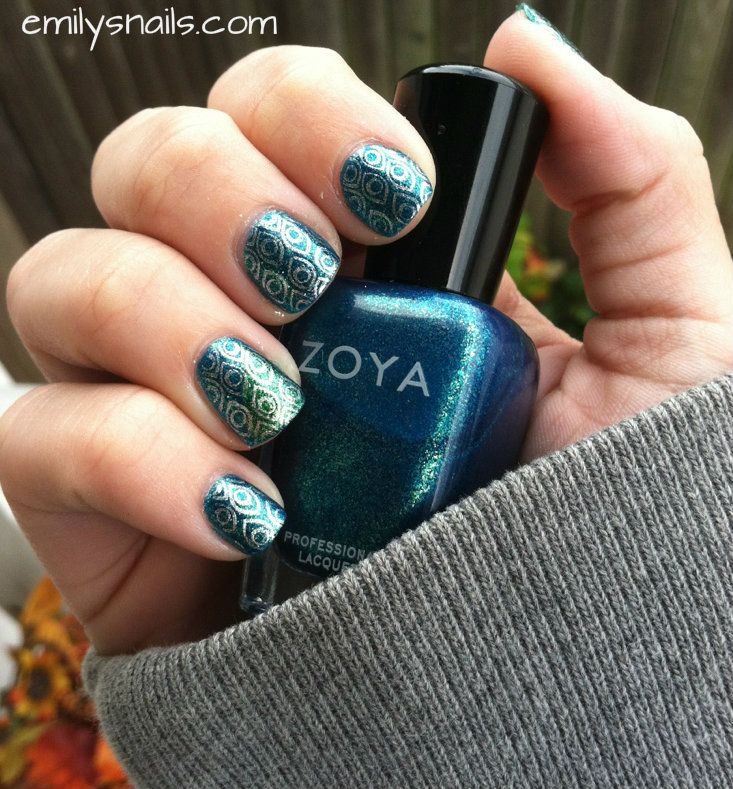
The print I decided to recreate was peacock feathers. I originally wanted to do a full peacock on my thumb and peacock print on the rest of my nails but that was a bust. I was happy that I decided against this, and I went with peacock print on all five of my nails:


The base color I used on my thumb is Zoya Ivanka. I used Zoya Charla on the rest of my nails. My ring finger has Charla topped with Ivanka on the top diagonal half. These two polishes are a match made in heaven. They go together so nicely. I stamped with Color Club What A Drag, a really great & inexpensive stamping polish. The plate I used is bundle monster 212

What do you think? Is this a look you'd try?
Monday, November 5, 2012

nude paisley

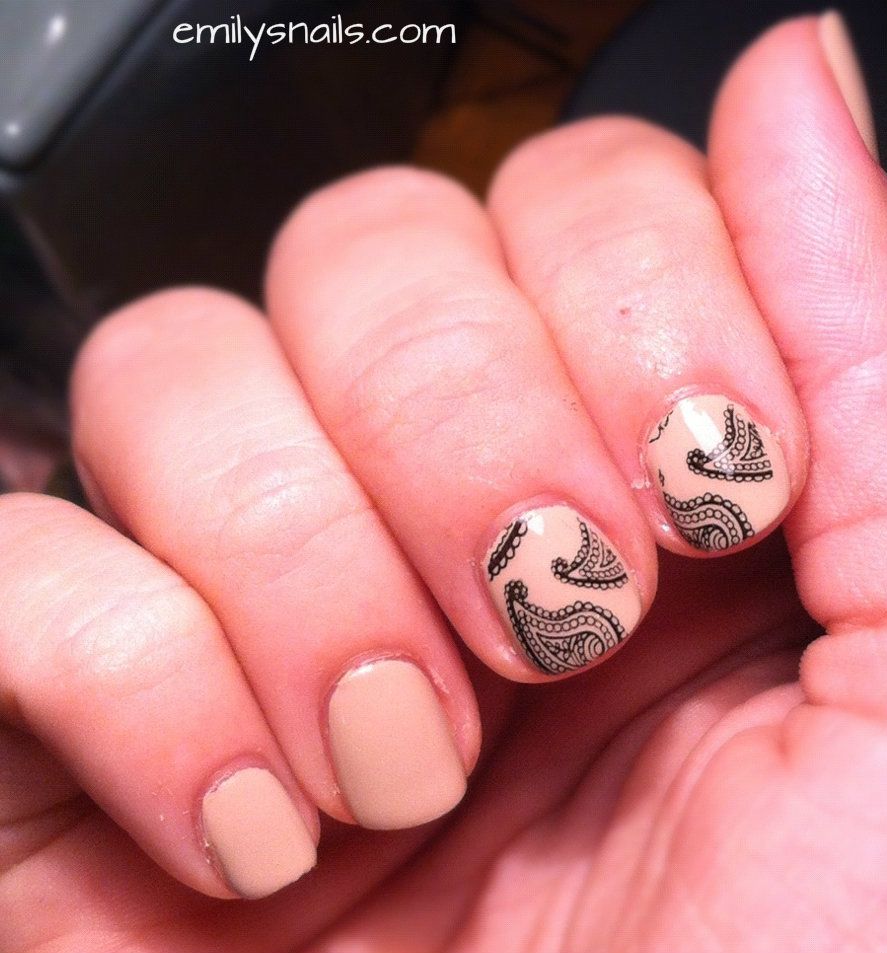
No, the title is not referring to Brad Paisley... how I wish it were! He's hilarious, sexy, and has a wonderful voice. Mmmmmm. He always comes to mind whenever I see paisley print. The paisley that I'm referring to comes from bundle monster's third collection of nail stamping plates (the plate I'm referencing here is #315)! If you ask me, this is a genius idea. Who doesn't love paisley?! You can do so much with it. I always like the look of black images over a nude or tan creme, and that's what I decided to go with for this manicure. 

At first, I started out with two coats of OPI Don't Pretzel My Buttons. I wanted to think of some clever, unique accent nail... but I failed. I originally went with this look:


Then, I fell in love with how the paisley stamp looked and I wanted to add more. I didn't like how this looked with only two nails stamped. Thus, I added more stamping and an accent of Cult Nails Happy Ending, from the Fairytale Collection that was released this summer. This was hands down my favorite Cultie collection to date. 


I'm not entirely sure how I feel about this combination. I love the paisley, but I don't like how dark the black is in comparison to the glass shard-looking multicolored glitter. It's something different, for sure. Overall, I seriously LOVE Don't Pretzel My Buttons. It's my ideal nude polish, for real. I'll probably wear it a million more times. My only problem with this shade is that I hate my application of it. I usually suck and mess it up by making it too splotchy or by accidentally flooding my cuticles. Oy.

What do you think? Are you a fan of paisley? What about nude polish?

With that, I'm out. Have a great weekend everybody! Tonight I have my first Saturday night off since my vacation in July! WOOO!

Friday, November 2, 2012

belated halloween post

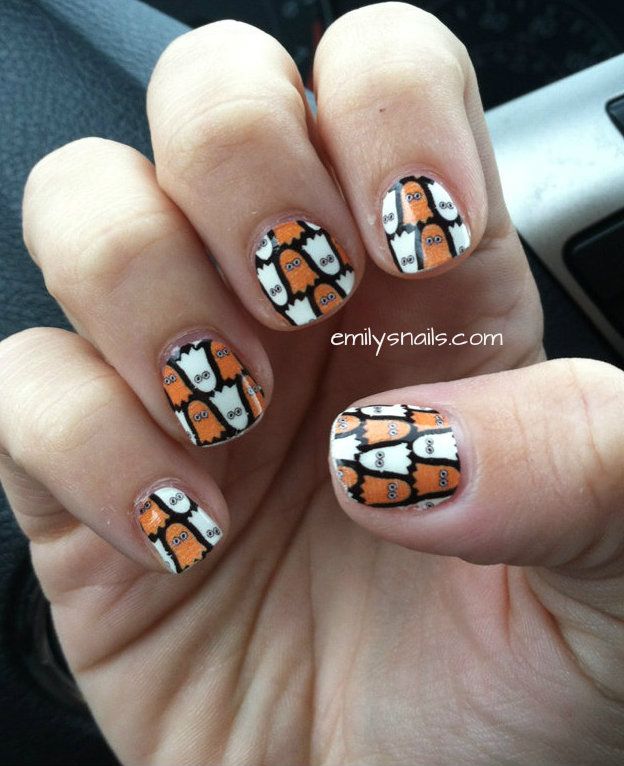
Hey everyone, tgif! Today I'll be showing you the nails I wore for Halloween (and still have on...). I'm dying to paint my nails, it feels like it's been forever since I last painted them. I got some Sally Hansen Nail Strips at Ocean State Job Lot for half price in February. They were leftover Halloween strips from last year. For only $3, I couldn't help but pick them up. I saved them in my bathroom cabinet for this Halloween, just  hoping I wouldn't forget about them. I'm happy to report that I didn't. Here they are:


I'm sure you saw these around a lot last year around this time. This was a pretty popular style. I got a lot of compliments on them- it's an easy way to have a fabulous manicure. These ones are called Ghoulie Girl (topped with a coat of Seche Vite). I'm sure they're almost impossible to find in stores now, simply because Sally Hansen comes out with a new collection of manicure/pedicure strips pretty much every season.

I'm always surprised at how easy it is to put these on. I was apprehensive the first time I used them, but my fears were distilled because they're so easy! I personally don't think they're worth the price tag of around $10. I can justify a bottle of polish for that price, simply because you can reuse it many times. These strips are only a one-time deal. Maybe for a vacation or wedding/big event they'd be worth it, because I find that they chip far less than regular polish.

Some tips:
  1. Don't use a base coat: put them on completely clean, dry nails.
  2. Make sure you clean your nails with acetone right before putting the strips on.
  3. Use the mini file that comes with the package: this file is your friend! You can use it to buff your nails prior to application, and also to file off extra ends of the nail strips.
  4. If you find that strips are too big for your nails, use scissors to cut off the extra portion. The strips are very easy to work with in this way.
  5. As you apply the strips, pull them up towards the tip of your nail so they go on completely flat and evenly on the nail.
What do you think? Have you tried these strips yet? Are they worth the money?

Friday, October 19, 2012

autumn leaves

Growing up, fall was always my favorite season. As I've gotten older, I tend to enjoy summer more. No classes, warm weather, more opportunities to travel and vacation... but as a kid, fall what were it was at. I loved the changing leaves, playing outside after school in the crisp weather with my neighbors, going to the Big E, camping... the memories go on and on.

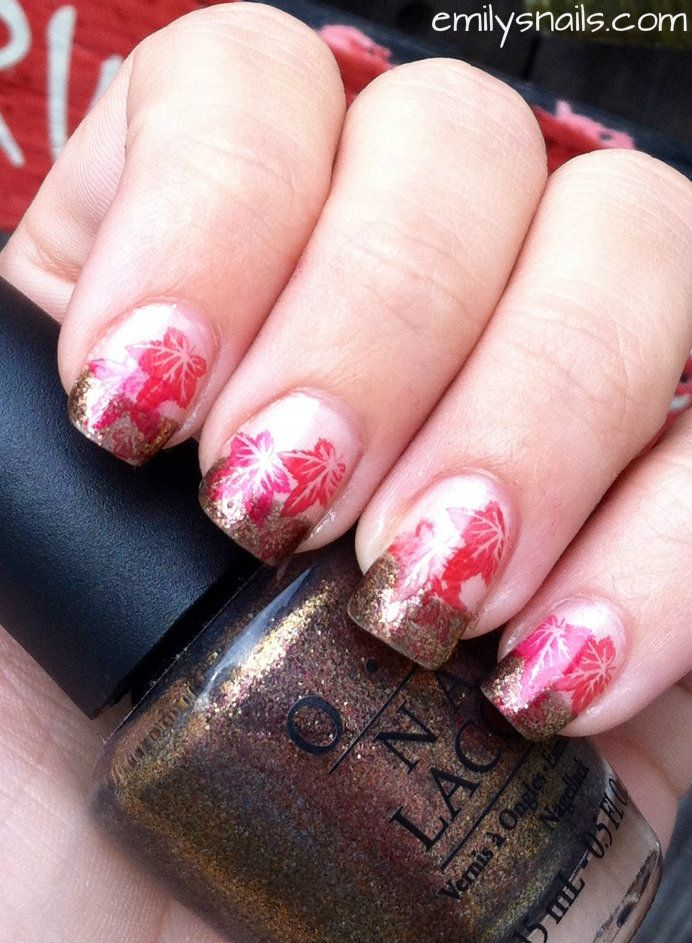
Today's manicure was inspired by something I saw on The Nail Network. I tried to copy this look in its entirety, minus a few color changes. I love everything about her blog; I suggest you check it out! Anyway, I found this manicure by googling "autumn leaves mani." I wasn't entirely impressed with some of the others but I loved this particular one. Here it is:

My version didn't come out perfectly but I was happy with the finished product. I first painted on two coats of Essie A Lot Of Shekels which is my go-to sheer pink/nude French manicure shade. Every time I use it, I fall more and more in love with it. I think it's an older color, because I got it in a clearance bin at a beauty supply store (actually, at the one I'll be working at starting next week!). Great clearance bin find.

I then freehanded some French manicure tips with OPI Warm & Fozzie (bottle pictured in the picture above). W&F is such a great fall shade! It's got so much depth to it. I swatched W&F on its own here, if you're curious! ;D The French tips don't have to be completely perfect because you end up stamping over them anyway. I used two coats of W&F to get this look.

For the leaves, I used image plate bm04 from bundle monster's first collection. I tried a whole TON of different colors to stamp the leaves but a lot just wouldn't show up well over my base. I ended up with a brown/orange, Love & Beauty Brick, and a red, OPI Revved Up & Red-y. Brick is actually a brown but looks more like burnt orange stamped. I wish I could've gotten more colors to work.

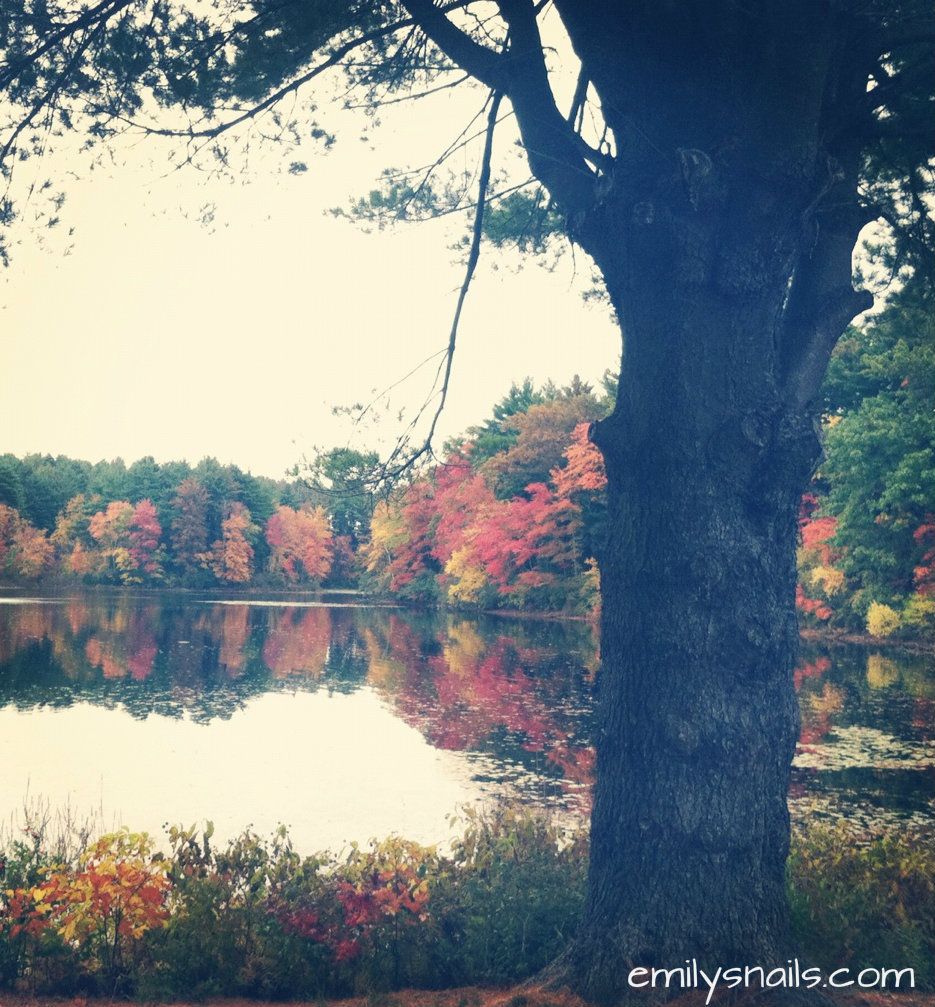
I'm eager to try this look again with different shades or even a different variation (ie butterflies instead of leaves, or snowflakes??). I'll leave you with two pictures I took at Ashley Reservior in the town next to mine in little old Western Massachusetts.


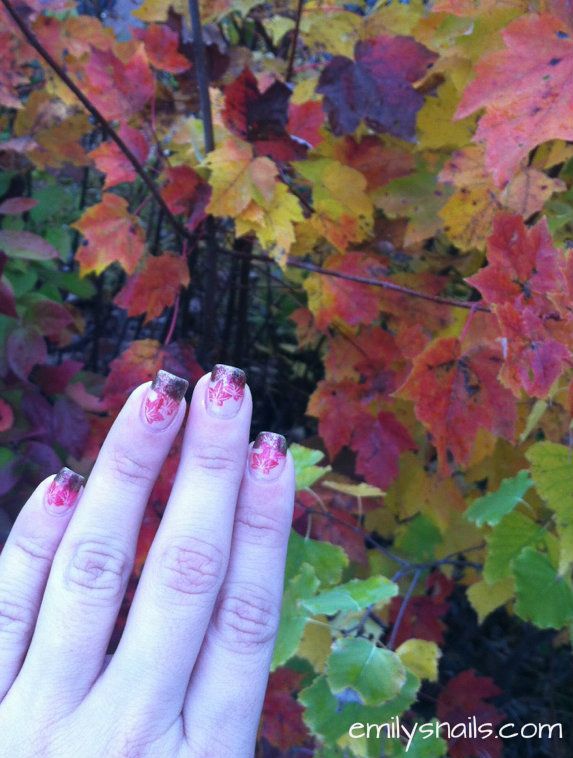
My foliage mani WITH some foliage! Couldn't pass up this shot.

This picture was edited on Instagram to show the depth of the foliage. I love this time of year.

What do you think of my autumn mani? Do the leaves change color like this where you're from?

Thursday, July 19, 2012

I've got a tennis ball on my nail!

this post was scheduled ahead of time! enjoy!
-> i'm busy TRYING to pack for my vacation.. i leave tonight at 1am! heading to washington, dc first!

I don't talk about things other than nails on here so as not to bore all of you, but today I'll give you a glimpse into the ever-exciting life of Emily. As some of you have have seen on my Instagram, I went to a tennis match on Sunday! I used to go to school and live in Newport, Rhode Island but some stuff went down and I moved back home. Every year, I go back for the Campbell's Hall of Fame Classic tournament that takes place each July. I bought tickets to the final months and months ago, hoping to see my FAVORITE player, John Isner. He didn't disappoint; he made it to the final and won, too! It was a great day spent with my best friend. We spent the morning walking around downtown Newport and shopping, and spent the afternoon watching some quality tennis.

The final was John Isner vs. Lleyton Hewitt. Hewitt is a former world #1 so it was amazing to see this match-up. If you're a tennis fan, too, you'll share my excitement over the next few pictures!!


John Isner is 6'7": he towers over everybody.


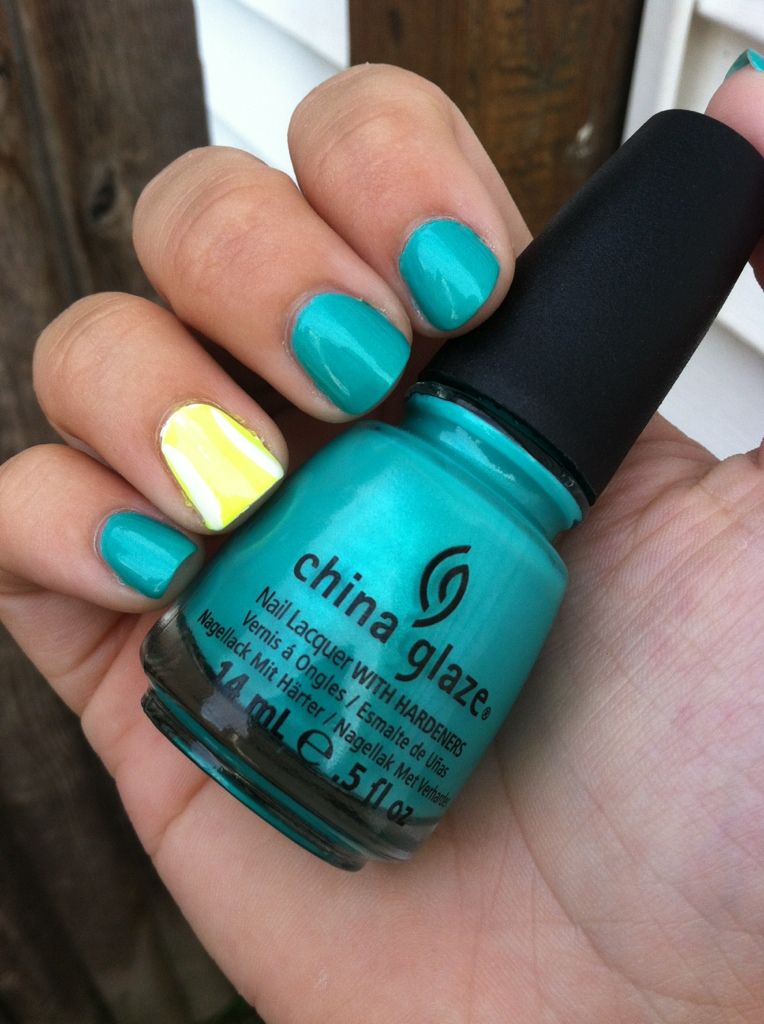
Ok, ok; I'll spare you the rest and show you my nails now ;-) 


Colors Used: China Glaze Turned Up Turquoise, OPI Alpine Snow, Sinful Colors White Nail Striping Polish, Nina Ultra Pro Solar Flare

I like how this came out! Nice and simple, just the way I like it. I used Alpine Snow under the neon yellow to make it opaque and bright which was a good idea. Without the white, vnl shows even with like, 100 coats. Yuck. Although I like the shade of Turned Up Turquoise, I hated the formula. Eh. Just too streaky to use and too hard to make look good. I like polishes that look good on their own, you don't have to try your hardest to get it to look good on the nail. But hey, that's just me.

I want to think of more tennis-inspired nail art to try... it's definitely one of the lesser appreciated sports and I'd like to feature it more on my blog. :-)

Friday, February 24, 2012

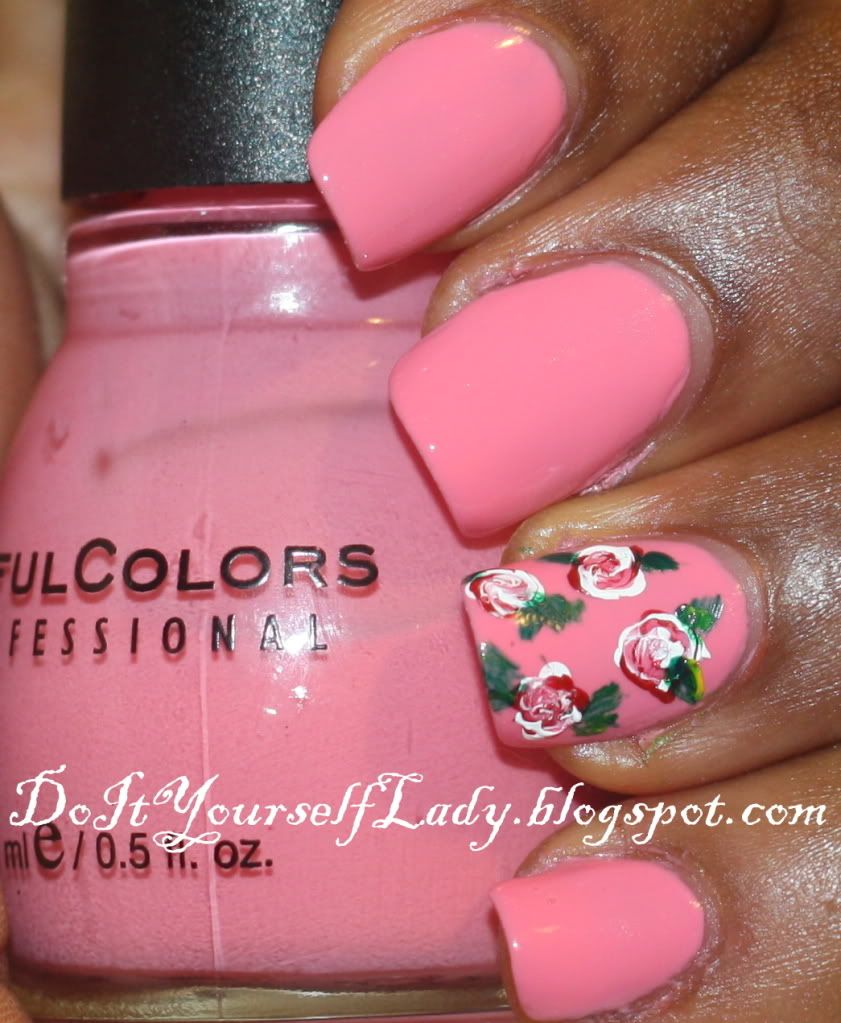
Guest Week Day Seven: Lizzy's Pretty Flowers

 Here is Lizzy from The Do It Yourself Lady. Her nail designs are great, and this one is no different!

Hello Embellished Nails Lovers! Hope y'all are doing fine on this lovely day. 

When I saw Emily's blog post about wanting Guest writers on her blog, I decided to challenge myself and send her a message to let her know I'm interested in doing a blog post. 

This is my first time ever doing a guest post, so I thought long and hard about what to do. I was inspired by this season of love.. Valentine's day. 

A while back, while going through Youtube videos like I often do, I came across this Tutorial, and I wanted to do something similar ever since. 
I hope you like what I've come up with. Something simple, yet sweet. Perfect for valentine's day. :-)


Friday, February 3, 2012

Red Solo Cup!

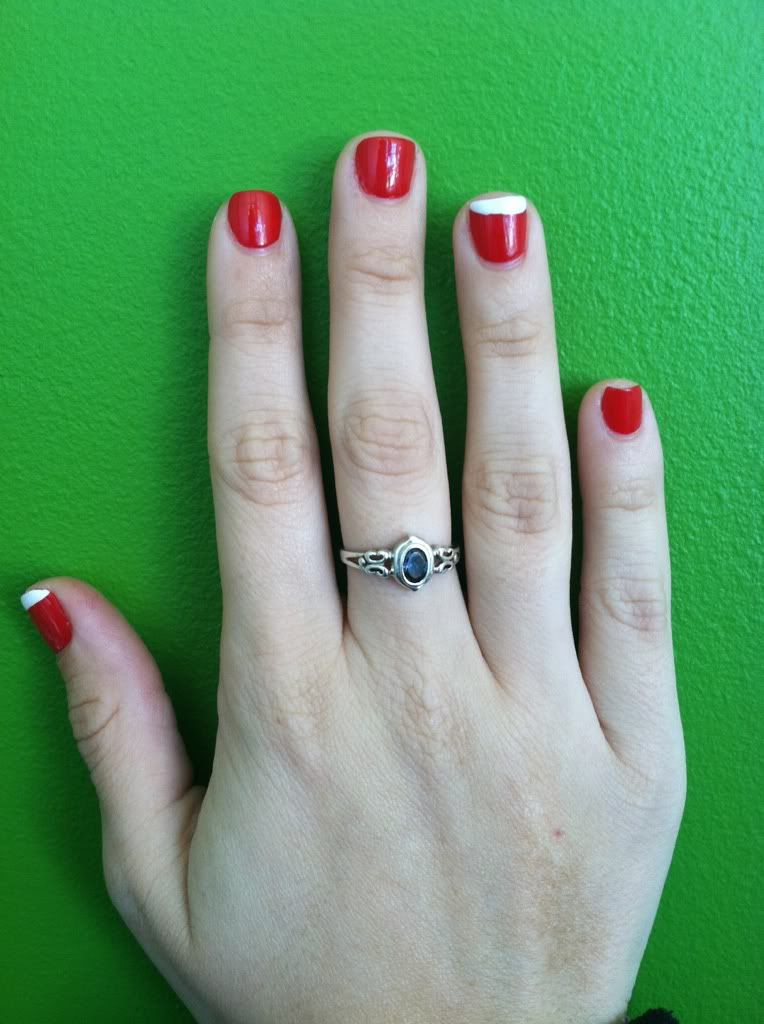
Happy FRIDAY! I haven't posted in what feels like an eternity! Work and school has caught up with me and I haven't really had the time to indulge in polish! :'( That all changes this weekend- I have an EPIC weekend ahead. Some of you may recognize the title of my blog post and what it refers to; I'm talking about the Toby Keith song RED SOLO CUP !! I'm seeing Toby in concert tonight so I had to attempt some red solo cups on my nails. This manicure also subsequently celebrates Wear Red Day which promotes awareness of heart disease. Check it out.

Sunday, September 18, 2011

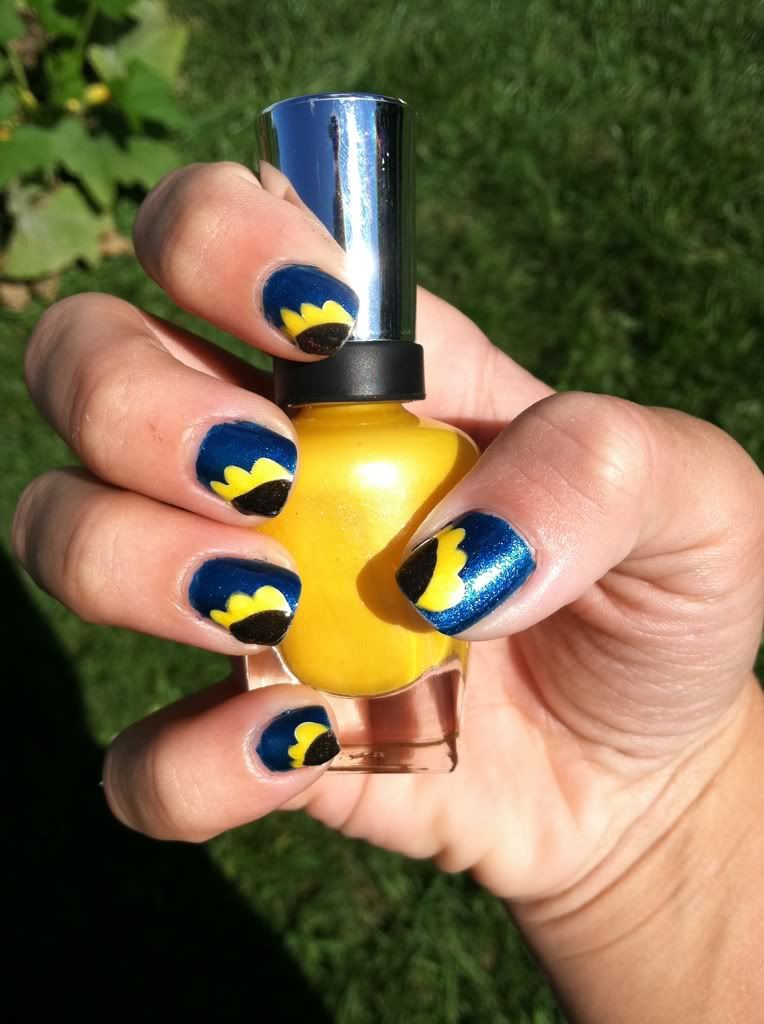
Sunflower Nails

Hi everyone! Happy Sunday!! Yesterday I stumbled upon a sunflower tutorial on Kayla Shevonne's blog, and I knew I had to try it out. Of course, my nails turned out looking nothing like hers but it's definitely better than I expected. I am seriously the least artistic person I know. But, as I've learned with tennis & other things I love, practice seriously helps! I figured I might as well try some nail art so I can get better at it. What better to start with than sunflowers!?