
Hey everyone, tgif! Today I'll be showing you the nails I wore for Halloween (and still have on...). I'm dying to paint my nails, it feels like it's been forever since I last painted them. I got some Sally Hansen Nail Strips at Ocean State Job Lot for half price in February. They were leftover Halloween strips from last year. For only $3, I couldn't help but pick them up. I saved them in my bathroom cabinet for this Halloween, just hoping I wouldn't forget about them. I'm happy to report that I didn't. Here they are:
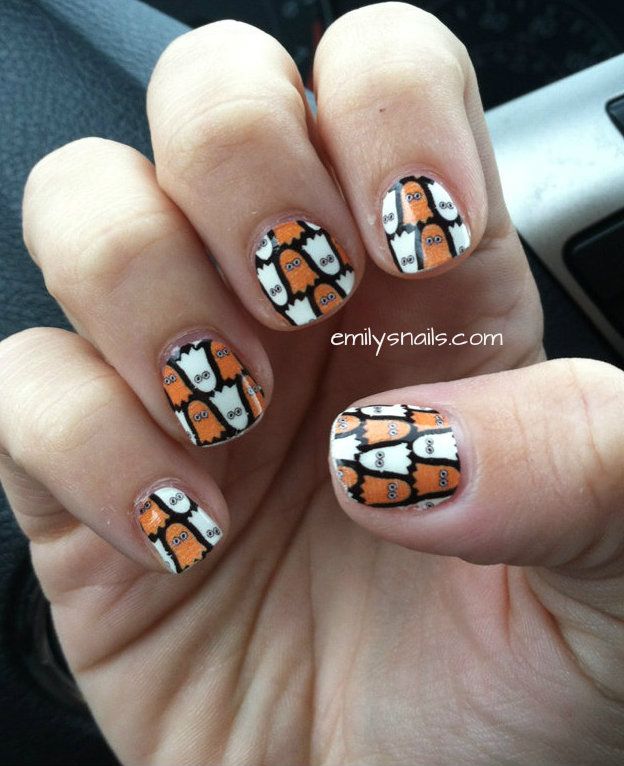
I'm sure you saw these around a lot last year around this time. This was a pretty popular style. I got a lot of compliments on them- it's an easy way to have a fabulous manicure. These ones are called Ghoulie Girl (topped with a coat of Seche Vite). I'm sure they're almost impossible to find in stores now, simply because Sally Hansen comes out with a new collection of manicure/pedicure strips pretty much every season.
I'm always surprised at how easy it is to put these on. I was apprehensive the first time I used them, but my fears were distilled because they're so easy! I personally don't think they're worth the price tag of around $10. I can justify a bottle of polish for that price, simply because you can reuse it many times. These strips are only a one-time deal. Maybe for a vacation or wedding/big event they'd be worth it, because I find that they chip far less than regular polish.
Some tips:
- Don't use a base coat: put them on completely clean, dry nails.
- Make sure you clean your nails with acetone right before putting the strips on.
- Use the mini file that comes with the package: this file is your friend! You can use it to buff your nails prior to application, and also to file off extra ends of the nail strips.
- If you find that strips are too big for your nails, use scissors to cut off the extra portion. The strips are very easy to work with in this way.
- As you apply the strips, pull them up towards the tip of your nail so they go on completely flat and evenly on the nail.
What do you think? Have you tried these strips yet? Are they worth the money?

These are the cutest strips I've ever seen!! I LOVE them!!
ReplyDeleteThank you for your comment! I thought they were cute too. :)
DeleteJeeze, I did not follow any of those tips! No wonder mine were a MESS! Yours look great!
ReplyDeleteThank you! The smallest change in technique makes a difference! Plus, Sally Hansen's are far superior to a lot of other brands.
DeleteWow these are absoultely beautiful and too cute to boot! $3? What an amazing deal you had! Thank you for the kind words I have added you onto my 'admired' blogroll :)
ReplyDeleteYes, $3 is a great deal! Totally worth it! Thank you so much!
DeleteSuper cute! I used the candy corn nail stickers for Halloween and also gave similar tips :)
ReplyDeleteThank you Kim! I've gotta check your post out!
DeleteThank you! :0
ReplyDeletei love it! so cute!
ReplyDeleteThanks! <3
DeleteSo adorable! I love the little faces on the ghosts, haha. I haven't tried any of the nail strips, because like you said, I couldn't justify the price. I'll have to keep my eyes open for sales! :)
ReplyDelete