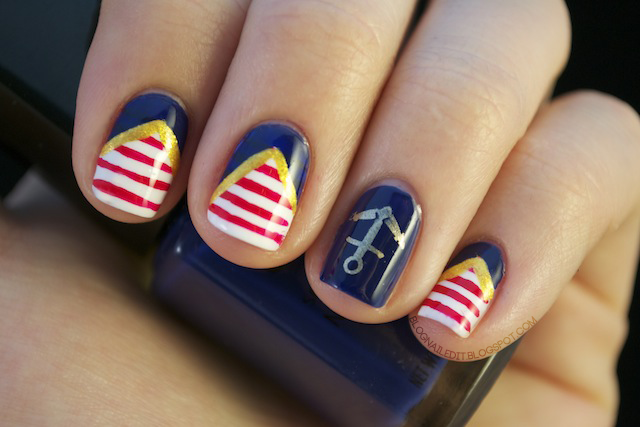
Katy's blog Nailed It is awesome. She's extremely talented. Under these pictures, I'll include Katy's commentary- be sure to click view more to see her how-to!


To get this look required a lot of time, patience, and patience. Especially for 4 out of 5 of my nails. I started the whole shebang with a base of French White Creme (Wet n' Wild), then striped some red lines using Be My Valentine (Sinful Colors). I really love the nail art brushes Sinful Colors makes. I use them all the time. You may remember Be My Valentine from my popcorn nails. The brushes are really easy to work with, but I don't recommend any neons. They're too difficult to translate onto nails because their formulas are so thin. Continuing on.
After the stripes, I painted a layer of Seche Vite over everything. This step is essential for taping. Ignoring the topcoat at this time will result in the whites and reds peeling up off of your nail, and I promise you don't want that. When Seche Vite dried (all of 2 minutes later), I applied tape to the top half of my nail, so all that was untaped was a fat V shape near my cuticles. Each nail was taped individually, and once covered, Moody Blues from Ulta was slathered on for the navy. Two coats sufficed, then I immediately removed the tape. All of my prior manicures using tape were done leaving the tape on, waiting for the polish to dry, then removing it. Re-reading Erika's blog (Chloe's Nails) revealed this to be a mistake. Removing the tape right away leaves much cleaner lines.
Finally, once all that was said, done, and dried I striped some gold lines over the V of Moody Blues using Gold Digger from Color Madric. Again, awesome striping brushes, but difficult to procure if you're not in Southern California, or know someone who is.
For my ring finger, the process was much easier. All that was done was painting a base of Moody Blues, then stamping the anchor image (BM 8) with Passion (China Glaze).

very very nice <3
ReplyDeletesooo cute. very well done! will need to try this :)
ReplyDeleteAwesome mani!
ReplyDelete